Monday, January 28, 2013

5 MINUTE BREAD - YOU HAVE THE TIME

Bread, Home Made Bread, White Bread, Home Made White Bread
Home Baked Bread 
This post is for those of you who are afraid of making bread or don't have the time.  5 minutes is all the time you need.  Interested yet? read on.

Bread is the staff of life and a truly portable food. Born of flour and a little micro-organism yeast.  Yeast is found everywhere in the air, on fruits, and on our bodies. How man came to understand and use yeast is unknown. A reasonable guess would be that beer was the first use for yeast. Ancient man could have left a mixture of wheat and water too long and when the carbon dioxide bubbles and alcohol formed they created an interesting fragrance and the curious human drank it.  There is even a theory that beer is the reason for civilization.  Then, tired of eating unleavened bread, someone dumped more flour into the beer mash and baked the result - bread was born.

The economics of bread is as astounding as the simplicity of the recipe. Grocery Store bread costs $2.75 for a 2 pound loaf, flour is around $2.59 for 5 pounds that will make 5 pounds of bread.  If your family goes through 2 loaves of bread a week your yearly bread budget is $286. If you made your bread, you would cut that cost down to $108.  Not only would you save money but the bread is better tasting and has no additives.

Bread is made from 4 basic ingredients: Wheat Flour, Salt, Yeast, Water. Simple and tasty. You will notice there is no sugar in basic bread. That's because the starch in flour will break down into simple sugar and feed the yeast. This happens rapidly. Salt retards the yeast growth a little and gives bread a finer texture and better flavor. Simple! The yeast I recommend be bought in 1 lb bulk packages of dry-active yeast and not the little envelopes that tend to contain yeast that is not interested in rising. Yeast should be stored in the freezer to keep it alive and active.

Now to make the bread.  5 minutes, I promise.
One 5 quart ice cream pail or any 5 quart container with a lid
From the tap - 3 cups hot water
Dump in 1 T yeast and 1T salt
Dump in 6 1/2 cups of flour
Stir with a spoon to moisten all the flour - dough will be wet
Bread Dough
The Bread Dough looks lumpy but is completely moistened
Let sit while you go watch an hour of TV
bread dough rising
After the dough has been able to rise - it is double in bulk
Wet your hands and punch down the sticky dough, bang the container a few times to get it down.
rising bread dough.
punched down dough, you can see the finger prints! 

Snap on the lid and stow the dough in the refrigerator overnight.  The dough will stay good for 3 days in the refrigerator so no hurry.
bread dough
Safe in the ice cream bucket and ready for the refrigerator.
The dough will continue to rise and fall without any intervention while it is in the refrigerator. This will release the sugars from the starch of the flour and give the bread a silky texture. There is no kneading with this bread, all the kneading is accomplished while you sleep.
Refrigerated dough has a silky texture

When ready to bake: you will need 2 one pound bread pans or one 2 pound bread pan
Grease the pans

Wet hands and pull out the dough and shape it into loaf shapes (dough is cold and never touches anything but your hands and the bread pan.) and place in pan(s), Grease the top of the loaves to prevent them from drying out. Let them rise about an hour.
dough just peeps over the edge of the bread pan

Pop them into a pre-heated over at 350 degrees for 40 minutes. When done, the loaves will be golden brown and sound hollow when thumped. Turn the pans on their side to cool.  Cooling on the side allows the bread to come free from the pan and it also changes the direction of the carbon dioxide bubbles in the bread ensuring even cooling.
Golden loaves rest on their sides to cool 


 Substitutions: (loaves will require more rising time and will be denser )
2 Cup rye flour for 2 Cup white flour + 2 tablespoons of molasses
1 Cup wheat germ for 1 Cup white flour + 2 tablespoons of molasses
1 Cup Oatmeal for 1 Cup white flour
3 Cups whole wheat flour for 3 Cups white flour

Saturday, January 12, 2013

BEST EVER BANANA BREAD FOR 100 YEARS

BEST EVER BANANA BREAD FOR 100 YEARS
Banana Bread in pan
Fresh from the oven - Banana Bread


"Best Ever" An amazing claim but true! This is such a simple, flavorful bread.  This recipe has been in my family for over 100 years! In my recipe box it is labeled  "Best Ever Banana Bread" and it is.  It is best eaten the second day but most loaves don't last that long.  This simple quick bread is a treat both winter and summer. Some simple rules about quick breads: Unlike muffins, quick bread batters need to be beaten to completely fragment the fruit, fat and flour mixture. Use a hand mixer and even though you can mash up the bananas with a fork, avoid the temptation and break out the hand mixture.
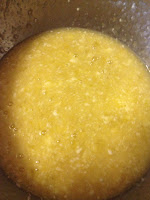
Banana Bread: Sugar, egg, fat, vanilla, bananas mixture
Mixture of Banana, Fat, Egg, Sugar


Quick breads are 'dump' breads. What the heck, you say? Dump recipes do not require special treatment or order for ingredients to be added. You start with the wettest, mix them and then dump in the dry.

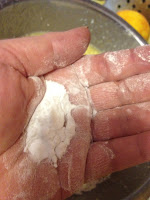
Measuring using the hollow of your hand
Hollow of my hand with 1 tsp of baking soda
Measuring for quick breads is not an exact process. You can use your hand. I always measure this way for recipes that are somewhat forgiving, candies are the exception to the rule. Candies are exact and any deviation will result in a disaster.  The hollow of your hand is 1 tsp. See the example picture. I like this way for salt and baking soda and powder as they tend to have lumps that will spoil the product. In my hand I can crush all lumps and insure the eater will not find a surprise lump of soda.


 If there are components of a quick bread that need to remain whole, like nuts, stir them in last.  A bit of good news is that grocers place ripe and over ripe bananas on sale, often selling them for a pittance. Usually it is the color of the peal and not the ripeness of the banana that sends them to the sale isle. This  bargain and should be scooped up and turned into the tasty treat.  Banana bread freezes well and I always feel elegant when I know there are a few loaves tucked away in the freezer. Be sure to freeze them is freezer bags when the loaves are cold. 


Ready to go, here's what you need.  Oven at 325 degrees and it will bake for 1hour 15 minutes.
3 over ripe bananas (remove only the bad spots)
1C sugar
1 egg
1/2 tsp vanilla (the vanilla will point up the banana flavor)
1/4 C fat (I use butter and if you are fat averse you can omit it - the loaf will be just a little chewier)
2 C Flour
1 tsp baking soda
1 tsp salt
Banana Bread Batter
Finished batter ready for the bread pan

I put the first 5 ingredients in the bowl and beat it until it is a fine mixture. Then dump in the rest and beat into a batter. It will be somewhat lumpy just make sure all the banana is blended.

Banana Bread, First slice
The first slice of Banana Bread
This is a somewhat stiff batter. pour into bread pan and bake.  Your home will now be filled with the fragrance of banana bread, let it cool before you dig in. It's hard to wait but it will be worth it.

Variation: if you want to add something special - add the zest of one orange and nuts are always welcome.
For spreads, Nutella is amazing for the chocolate lover - a little sweet for my taste. I like cream cheese,  it is subtle and compliments the bread.

Friday, January 4, 2013

Winter and Soup and the Why of it All

Calico Bean Soup: Ground Beef base, Beans, Barley, Tomato. 
We all love soup, warm and dense winter soups. I am partial to the soups with veggies and grain in them. I'm not as fond of soups with pasta. So Chicken and Rice, Beef Barley,Vegetable Beef, Corn Chowder, and Calico Bean are all at the top of my soup list. These are the soups that have a dark savory multilayered flavor system that make them so very satisfying.

Soups are easy to make. There is a little secret, of course,  to the spices and vegetables that add the multi layers and healthful support to soup. If you remember the song Scarborough Fair, by Simon and Garfunkel, you have most of it. Parsley, Sage, Rosemary and Thyme. Add to that sautéed onions and minced garlic you have the rest. Below I have listed what they bring to the soup. I have also listed the vegetables common to soups and how they fit in the sweet, savory, pungent, and acid of soup.

Parsley -Parsley is a good source of antioxidants, folic acid, vitamin C, and vitamin A. Proclaimed health benefits include anti-inflammatory properties and a boost to the immune system.
Sage - It's uses as an anti-sweating agent, antibiotic, anti-fungal, astringent, antispasmodic, estrogenic, hypoglycemic, and tonic are documented.  In a double blind, randomized and placebo-controlled trial, sage was found to be effective in the management of mild to moderate Alzheimer's disease. See, those ancient folks knew what they were doing. 
RosemaryRosemary contains a number of potentially biologically active compounds that are antioxidants. It has been used for centuries to improve memory. 
Thyme  It has antiseptic and anti fungal properties. Oil of Thyme or Thymol is the active ingredient in Listerine. It also has antibiotic properties and before the advent of modern antibiotics, oil of thyme was used to medicate bandages.
Onion (Leek) - They are known for their anti-inflammatory, anticholesterol, anticancer, and antioxidant properties. For a more delicate and warmer flavor, substitute Leeks for Onions. You will be amazed at the subtle over and under tones. 
Garlic - This is a virtual pharmacopeia. It is an antibacterial, antiviral, and antifungal agent. Thought to lower cholesterol and remove plaque to name some of the cardio-vascular healing properties. 

Wow, no wonder soup is a "souper" - healthy food!  And it's so easy to make. So let's get started!

General measurements:
1/2 gallon water (two cups less if you do not use any grain such as rice or barley)
1 lb of meat (do not count bones)
1 C grain
1-4 C vegetables
Base of 1 C diced onions, 1T minced Garlic 1 tsp each of Parsley, Sage, Rosemary and Thyme
Salt and pepper to taste (begin with 1 T salt you will need more. (You can also use 4 bullion cubes instead of salt for a richer flavor)


All soup begins the same way. For every 1/2 gallon of liquid: sauté 1 cup onions, 1T minced garlic in oil (I like Pompeian light olive oil  ) till onions are transparent. Add to liquid along with 2T Parsley, 1tsp each of Sage, Rosemary, Thyme. 

A word about raw and cooked meat.  
Raw
Raw beef needs to be seared on all sides. This greatly improves the flavor of the meat. Soups that start with raw meat will need to cook all day long so they are good crock pot candidates. Raw Chicken: It is best to cut up the chicken or start with cut up chicken. Remove parts that have tiny bones like the back and wing tips. This will save you lots of time fishing them out of your soup. Blanch the chicken before you add it to the soup pot. I like to put my cut up chicken in a colander and pour boiling water over the pieces. That is enough to remove excess blood and fat that will be unattractive in the soup and it will improve the flavor of the chicken. Then add the Chicken to the soup pot and again, cook it all day long. 

Cooked
Add the cooked meat to the soup pot as is. There is not need to do anything other than cut it into chunks.  The time the soup cooks is greatly reduced to an hour. 

Ground
Ground meat is browned and added to the soup pot. Cooking time will be the same as for the Cooked Meat soup. 

Vegetables - 1 cup of each chosen
I like to divide them into two categories: sweet, pungent and neutral. The sweet vegetables for soups are peas, parsnips, carrots and squash. The pungent vegetables are Brussels sprouts, peppers, broccoli, and celery.  The neutral vegetables are corn, green beans, lima beans, spinach, and okra.  Use only one sweet vegetable and pungent vegetable in any soup. You want them to own their flavor layer. 

Grains - 1 cup
Grain adds thickness and personality to soups. My favorites are rice, potatoes and barley. Quinoa and whole oats are two other options. They add texture and chew to the soup. 

Acid - about 2 T do it to taste These are added last, just as the soup is ready to serve as they are the most fragile of all the flavors. 
Yes, a good soup needs a source of acid. Tomatoes, lemon and lime are the three acids I like to use. It is the pairing of the Acid with the meat that makes the soup distinctive. (If you use Tomatoes as your acid source, use one can of chunk fruit.

For a beautiful Chicken Rice soup use 1 C of chopped spinach for your neutral vegetable, diced carrots for your sweet and 1/2 cup of finely chopped celery for the pungent. Use 1 tsp of lime juice with a little lime zest. When you serve it, float a dollop of sour cream with grated ginger . This is a elegant soup and very colorful. It tastes great and is eye candy as well. 

There you have it. The basics for soup. Try it out and mix and match the ingredient lists for soups that are your own.